You are on our Australia website. Please select your region to see content specific for your location


Finishing
Finishing
There are 18 finishing steps to a carpet. When all these steps are done by hand, it can take up to a month to glisten in perfection.
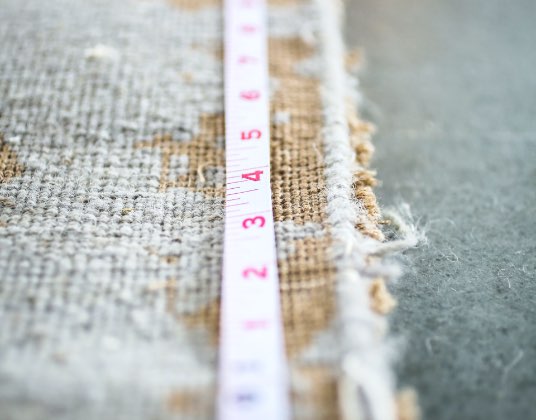
1. Measurement
Due to the discrepancies of hand-knotting, the carpet tends to vary in length and width. The carpet is measured to ensure that the variation comes within limits so that the size of the carpet fits the intended standard sizing.
Size Guide2. Knot Counting
To ensure that every knot from the map has been woven into the carpet, each and every knot is counted by hand. The craftsman goes through line by line, knowing how many knots should be there in every line to make sure that it has every part of its intended design. If any knot is missing, that line would be checked against a map to determine which knot was missing, then that knot would be surgically repaired.
3. Pile Height Checking
Pile Height Checking is the first step in ensuring that yarn is not wasted, and that the carpets quality can be assured after all the finishing steps. If the pile of the carpet is too heavy, the quality supervisor would work with the weaver in developing a skillset to help them reduce the usage of yarn.
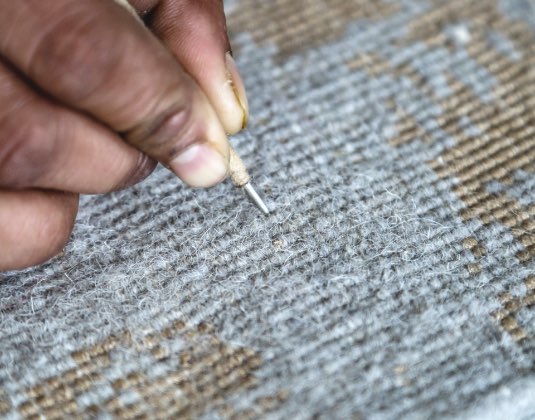
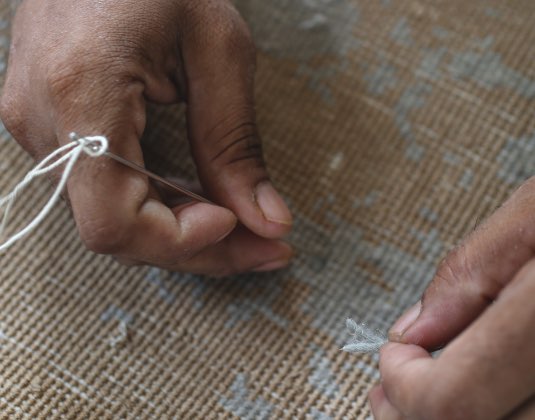
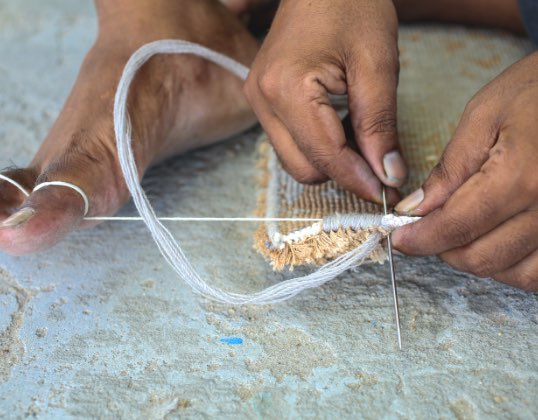
4. Raffu - Repairing
For discrepancies in the knot count and if there are some sections of the carpet where the pile is below the minima, an extremely technical artisan steps in. The doctors of rugs, these artisans use a large needle and thread to surgically repair the carpet. It’s a painstakingly long process, and each quality check strives to ensure that errors are not made that require this repair. Once repaired the carpet has no mark to show, which speaks to the finesse of the artisans involved.
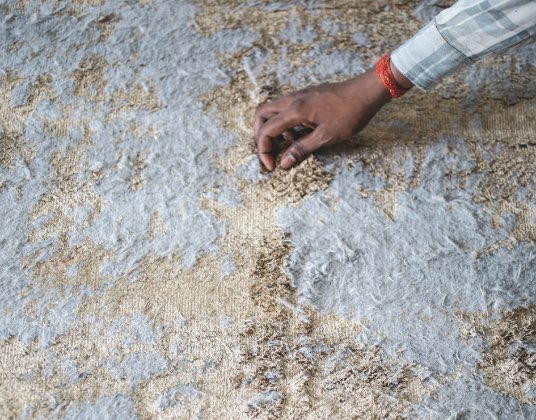
5. Thukai - Knot Beating
Since the hand-knotting process is imprecise, the varying width of the yarn and the differences in each knot tend to warp the design that was intended to come out on the carpet. This warp is because the line of knots is not straight when it comes off the loom. Craftsmen in the finishing centre measure out the warped segments and then use a large iron nail and hammer to knock the knots along the warp and weft to align the pattern. This process it quite time consuming and loud, and requires a craftsman’s precision to ensure the pattern is displayed perfectly.
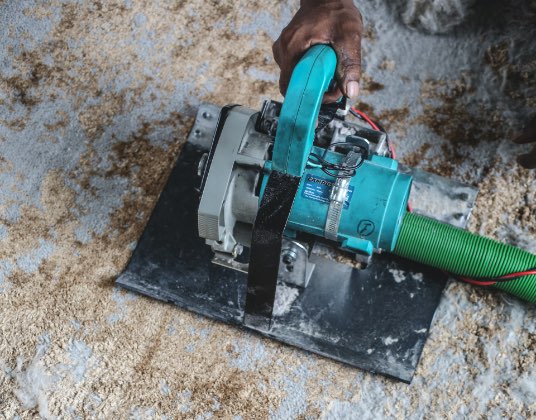
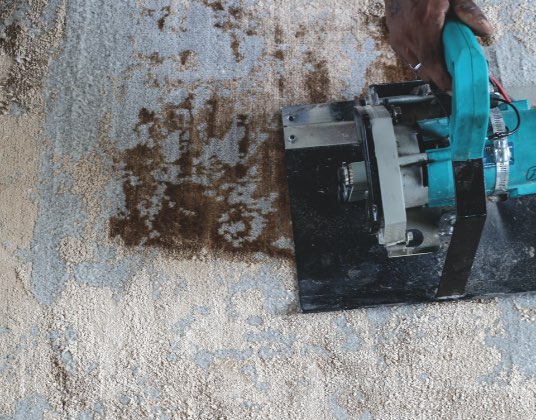
6. Kachi Kainchi – First Shear
This is the first phase of shearing done to the carpet. Its only purpose is to ensure the pile of the entire carpet is made to one height. Since the yarn is cut by hand during the weaving process, the size of the pile has minor differences which are evened out by a shearing machine with a gyro, and it is wielded by a craftsman that goes over the carpet.
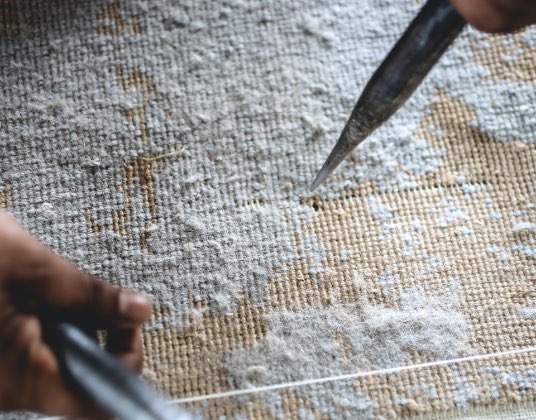
7. Sua Birai – Design Correction
With a longer pile height and because of the weaving process, yarn intermixes with the neighbouring yarn, which can blur its design. Craftsmen go over line by line of the rug with a large skewer, untangling the yarn and giving the design its intended definition.
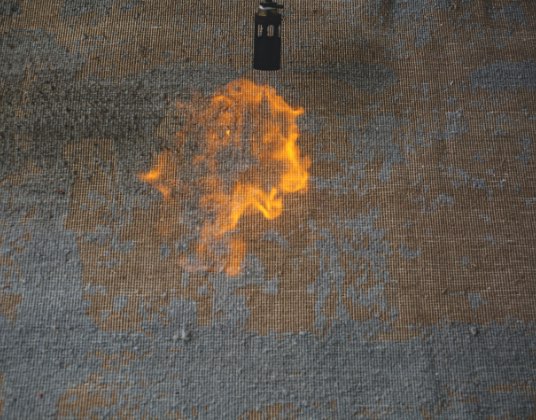
8. Back-burning
The back burning process is fairly straightforward. A carpet is placed at a distance from a flame, or a torch is taken over it. The flame singes the back of the carpet which clears out any loose strands, but more importantly tightens all the knots in place. When exposed to heat, the yarn recoils and shrinks which increases its durability immensely.
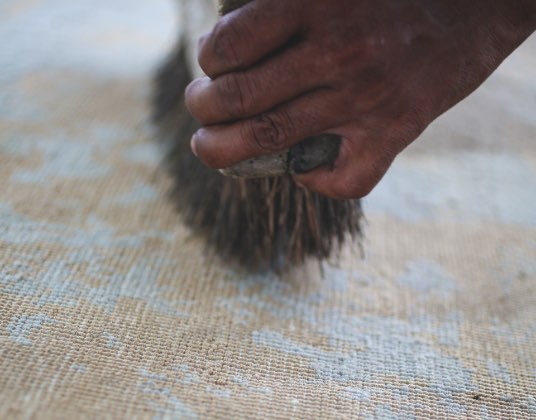
9. Back-burn Cleaning
The singed particles that collect on the back of the carpet are brushed off to give the carpet a pristine look at the back.
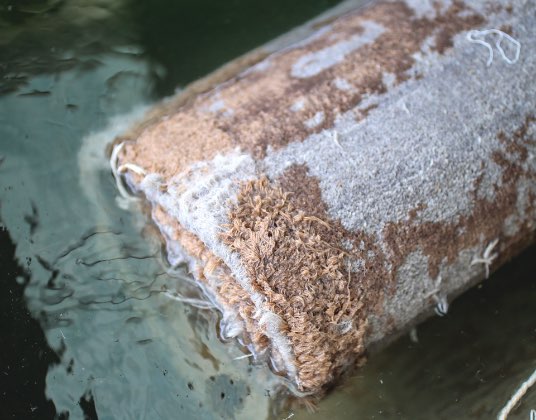
10. Dipping
Dipping is when a carpet is placed in a cleansing wash. The carpet soaks and sanitises to clear out any impurities that were lodged in. The carpet absorbs all the fluid for it to throw out all the impurities when washed.
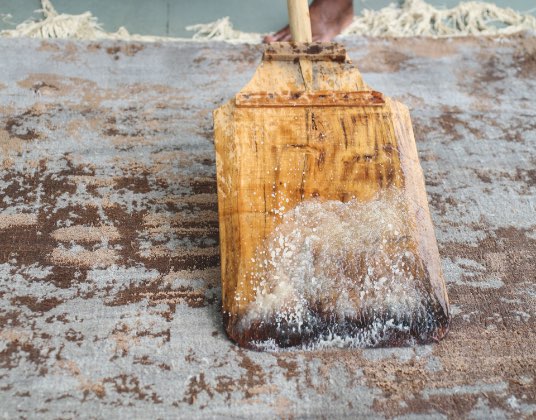
11. Washing
One step that can be easy to associate with is washing. It may sound simple, but there’s a reason carpets aren’t washed in every home. Each carpet isn’t washed, but rather bathed and groomed. It’s an art in itself. Washers lay the carpets onto the floor, and methodically pour water and mild cleansing solution, using a unique oar-like paddle to flush out the dirt trapped inside. Each stroke takes out what is unnecessary and at the same time increases the strength of the underlying knots. The strokes are done in unison and perfect coordination, and technique is so effective, it uses a prescribed minimum amount of water and is done in 15 minutes!
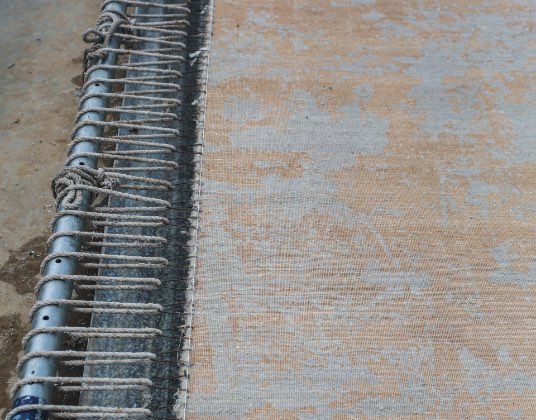
12. Khinchai – Stretching
Once washed, yarn and the underlying cotton warp & weft shrink. This helps tighten the carpet, but also changes its size. To bring it to its prescribed size, the carpet is stretched out on an iron frame to the precise size requirement. The knots stay tight but are now balanced and even.
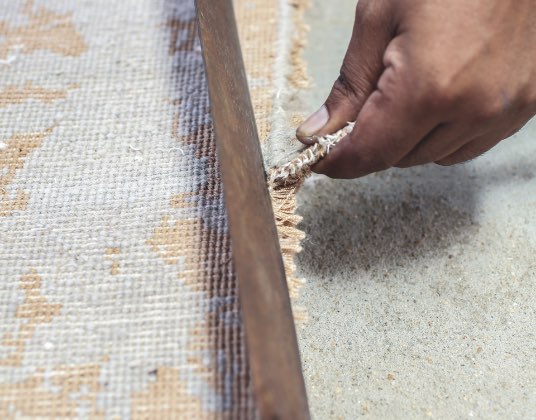
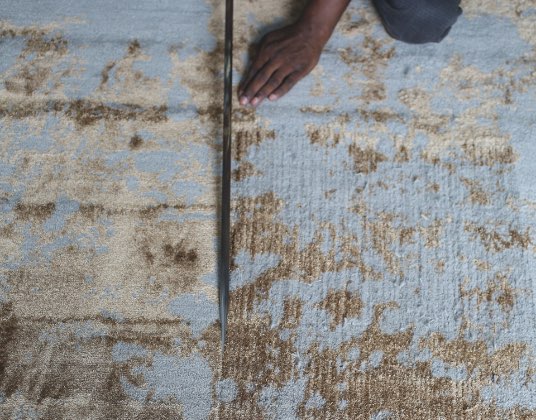
13. Cutting
When the carpet is taken off the loom, artisans bind the edges of the carpet with the warp and weft they use. To allow freedom of design and creating more durable binding, the original binding done on the loom is cut off the carpet.
14. Binding
The edges of the carpet are binded together to give it its finishing look and durability. The style of binding done along the width of the carpet has a range of patterns to style the carpet, but uses a standard style along the length to hold the carpet together. The traditional designs use a tassle, while modern designs are binded on all sides.
15. Pucci Kainchi – Final Shearing
In this final phase of shearing, the intended pile height is set onto the shearing machine before the craftsman goes over the carpet. This measured pile height is what the carpet is then categorised under before sale.
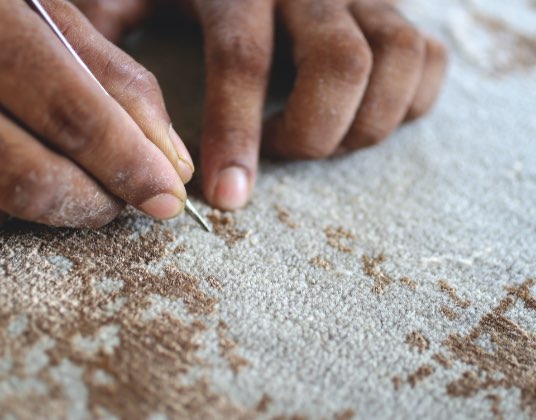
16. Kalam Birai – Detailing
This is considered the second phase of design correction, when an artisan takes a carpet needle and sharpens the design. The interlocked yarn is separated knot by knot to make the image clear, perfecting its look. The name Kalam Birai means correcting by pen, and perfectly describes its intricacy.
17. Chinte Nikalna – Snipping Visible Cotton
This step is common across textiles, where an artisan goes over the entire rug, removing and snipping extra strands of cotton thread. While this may be an easy task on cloth, in a rug the artisan must brush through the pile searching for the smallest hints of imperfection and finally perfect the carpet.
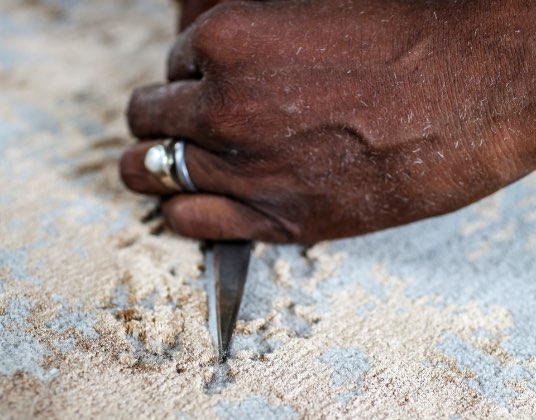
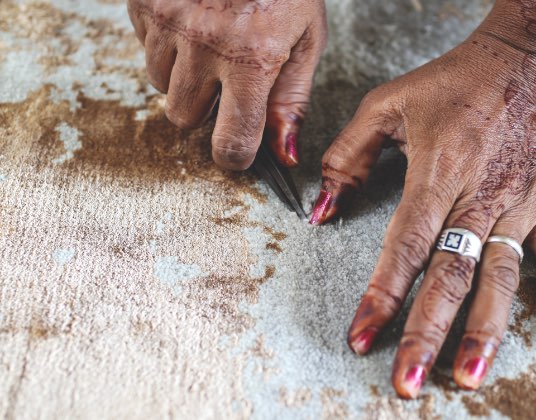
18. Carving & Embossing
Khadi Gultarash is also known as carving. This is a method to give cuts in the design. During this process, the artisans keep the scissors straight up and make a cut in the design.
Put Gultarash is also known as embossing. This method is used to give a high and low effect on the rug. During this process, the artisan keeps the scissors bent and moves it around the design to provide a three-dimensional look.